


2.6. Creating NetBeans Project
Now that we have the skeleton application set up and working, we will want to change something with it in the future. To easily navigate the directory structure, edit files and debug the website, the common practice is to use an IDE (Integrated Development Environment). In this book, we use NetBeans IDE (see Appendix A. Configuring Web Development Environment for more information on how to install NetBeans).
To create NetBeans project for our skeleton application, run NetBeans and open menu File->New Project.... The New Project dialog appears (see figure 2.4).
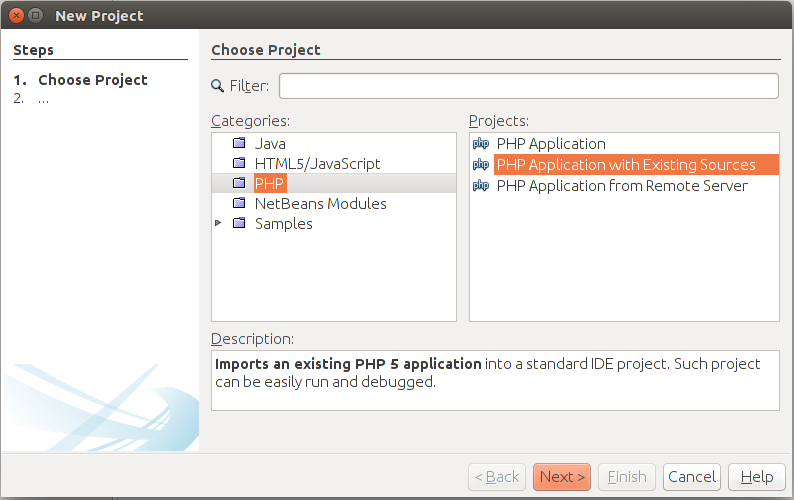 Figure 2.4. Creating NetBeans Project - Choose Project Page
In the Choose Project page that appears, you should choose PHP project type and in the right list select Application with Existing Sources (because we already have the skeleton application's code). Then click the Next button to go to the next page (shown in figure 2.5).
 Figure 2.5. Creating NetBeans Project - Name and Location Page
In the Name and Location dialog page, you should enter the path to the code (like /home/username/helloworld),
the name for the project (for example, helloworld) and specify the version of PHP your code uses (PHP 5.6 or later).
The PHP version is needed for the NetBeans PHP syntax checker which will scan your PHP code for errors and
highlight them. Press the Next button to go to the next dialog page (shown in figure 2.6).
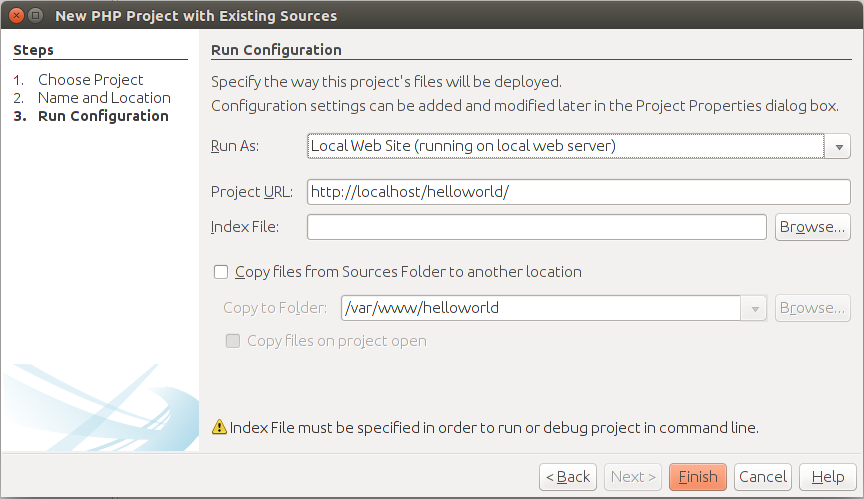 Figure 2.6. Creating NetBeans Project - Choosing Configuration Page
In the Run Configuration page, it is recommended that you specify the way you run the website (Local Web
Site) and website URL (http://localhost). Keep the Index File field empty (because we are using mod_rewrite,
the actual path to your index.php file is hidden by Apache). If you are seeing the warning message like
"Index File must be specified in order to run or debug project in command line", just ignore it.
Click the Finish button to create the project. When the helloworld project has been successfully created, you should see the project window (see the figure 2.7).
 Figure 2.7. NetBeans Project Window
In the project window, you can see the menu bar, the tool bar,
the Projects pane where your project files are listed, and, in the right
part of the window, you can see the code of the index.php entry file.
Please refer to Appendix B. Introduction to PHP Development in NetBeans IDE for more NetBeans usage tips, including launching and interactively debugging ZF3-based websites.
It's time for some advanced stuff...
Congratulations! We've done the hard work of installing and running the Zend Skeleton Application, and now it's time to have a rest and read about some advanced things in the last part of this chapter.