


Launching EC2 Linux Instance
On the EC2 Console side bar menu, under the INSTANCES section, click the Instances link, and on the page that appears, click the Launch Instance button. Then you will have to pass through several Wizard-like pages.
Step 1 – Choose an Amazon Machine Image (AMI)
The first of them is the Choose an Amazon Machine Image (AMI) page (shown in the figure below).
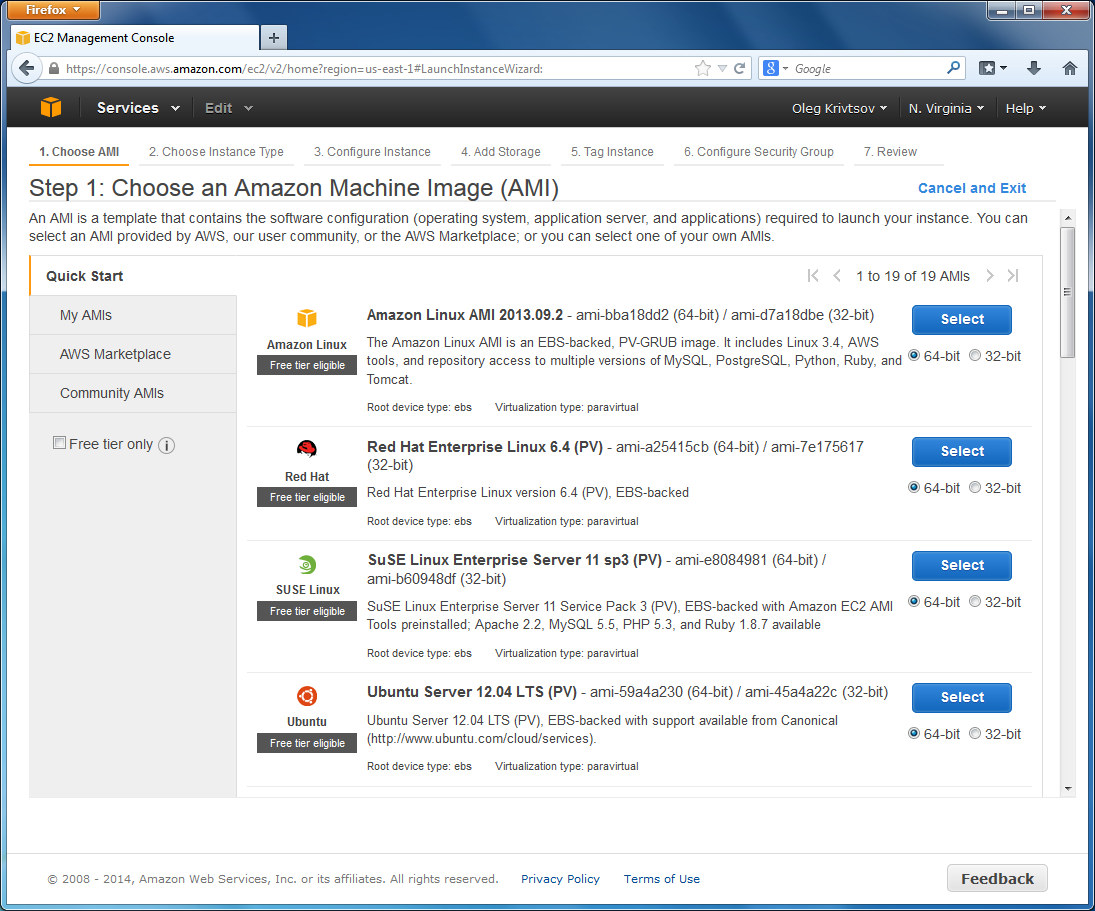 Figure E.4. Choose an Amazon Machine Image (AMI) page
On the page that appears, you need to select the Linux distribution you want to run on the virutal machine. In this tutorial, we choose Amazon Linux AMI, 64-bit.
Amazon Linux is a distribution from Red Hat Linux and Cent OS family. The installation instructions are common between these distributions. For example, all these distributions use the yum package manager. So, if you know how to install a program in Cent OS, you will be able to apply the same steps to install it in Amazon Linux.
In this tutorial, we use Amazon Linux, but you may select another distribution, if you wish.
Click the Select button at the right side of the Amazon Linux AMI option.
Step 2 — Choose an Instance Type
Next, the Choose an Instance Type page appears (see the figure below).
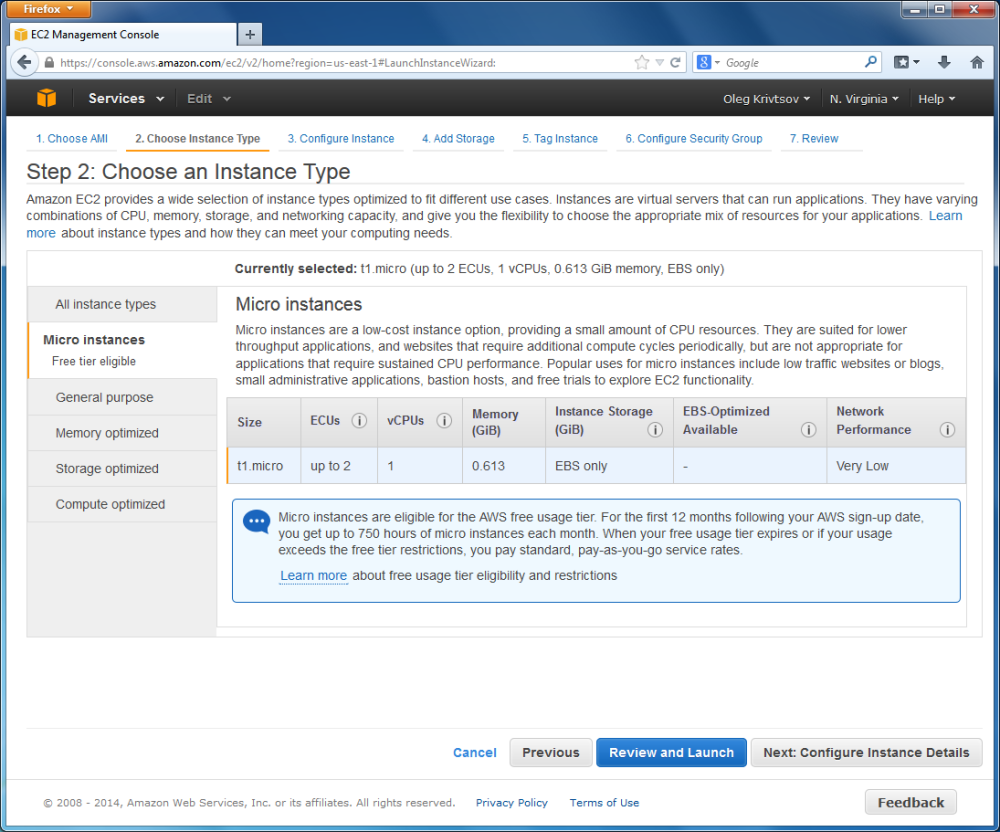 Figure E.5. Choose an Instance Type page
On that page, you can choose the parameters of the virtual machine which affect its performance. In this tutorial, we will use the Micro Instance type, which is available for free usage. Please note that the Micro Instance type is limited in CPU and memory resources, so it is not well suitable for high-load production systems.
Now click the Next button to proceed to the next page.
Step 3 — Configure Instance
The Configure Instance page appears (shown in figure below).
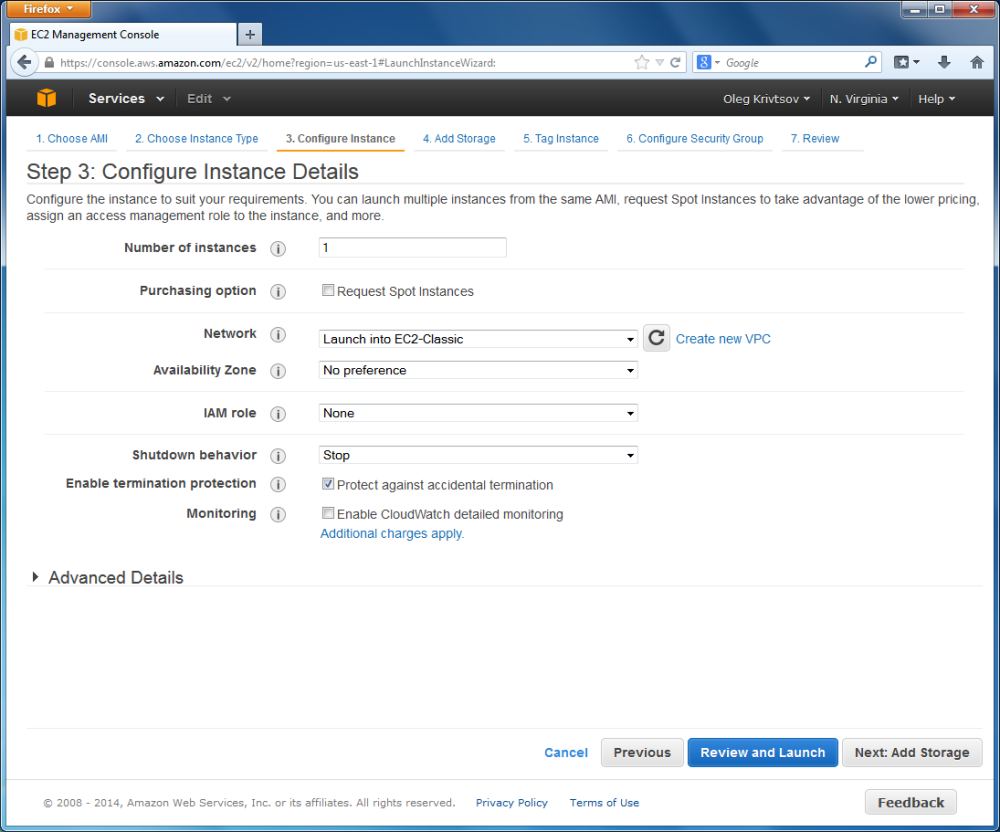 Figure E.6. Configure Instance page
On that page, you can edit instance details. It will be enough to set check on the Enable termination protection check box (this will protect the virtual machine from accidental termination).
Step 4 — Add Storage
Click the Next button to go to the Add Storage page (see figure below for example).
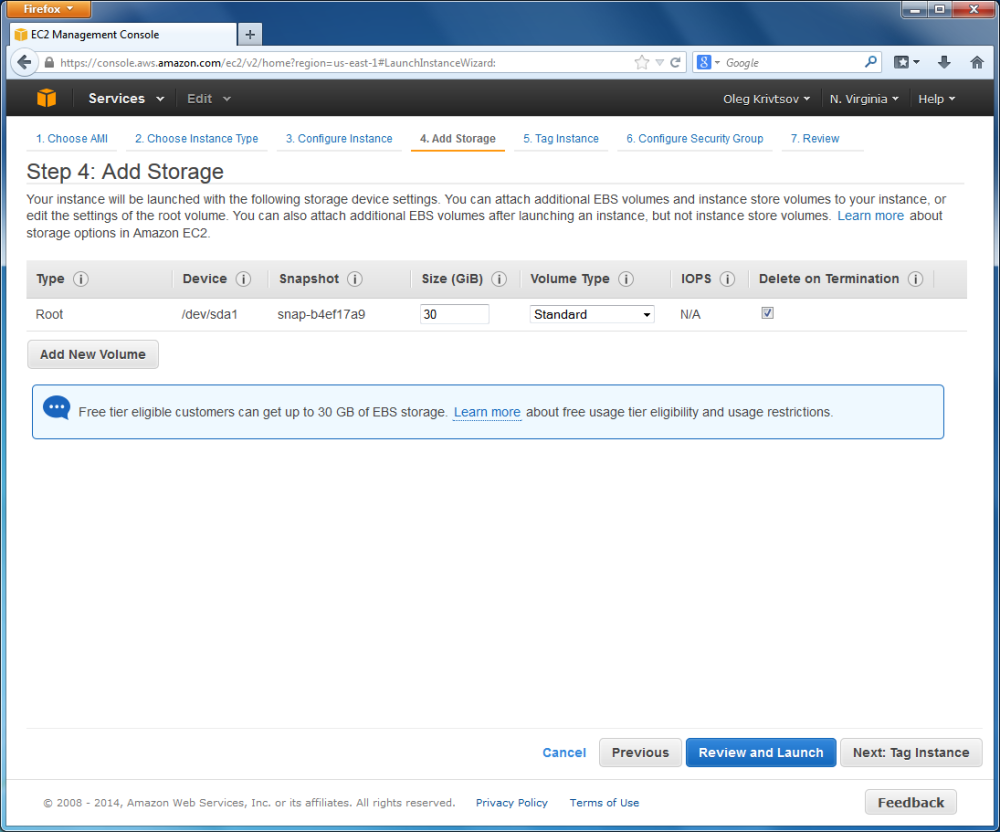 Figure E.7. Add Storage page
On that page, you can adjust the size of the virtual hard disk drive attached to your virtual machine (for the free usage, you are able to allocate up to 30 GB of storage space). This disk drive is part of EBS service (Elastic Block Storage). It is very reliable and automatically backed up to protect your data from accidental loss.
Step 5 — Tag Instance
Click the Next button to go to the next page called Tag Instance.
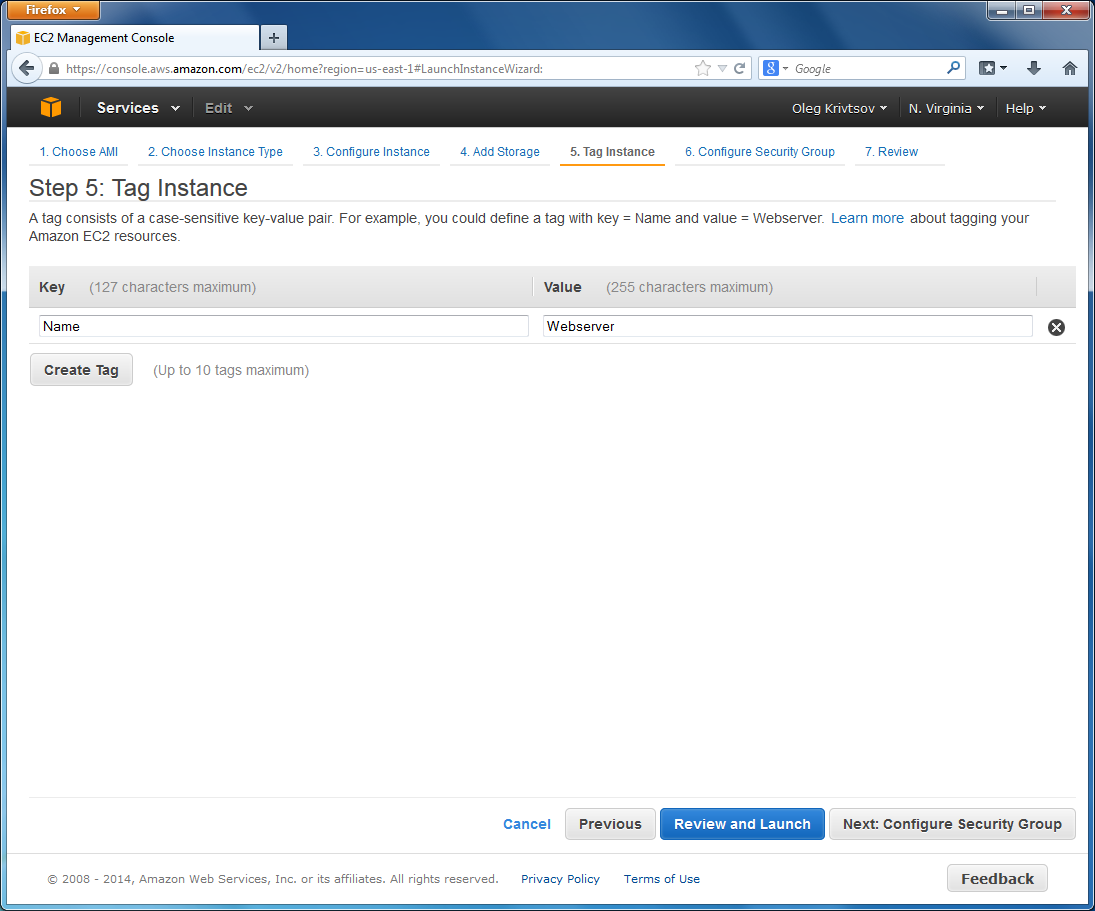 Figure E.8. Tag Instance page
On that page, you will be able to add one or several tags to distinguish this EC2 instance from the others (in the future, you may launch more instances in your account). For example, add the Name tag and set its value to "Webserver". This will help you to remember that this instance's purpose is to run the Apache Web Server.
Step 6 — Security Group
Click the Next button to go to the next page called Security Group (see below).
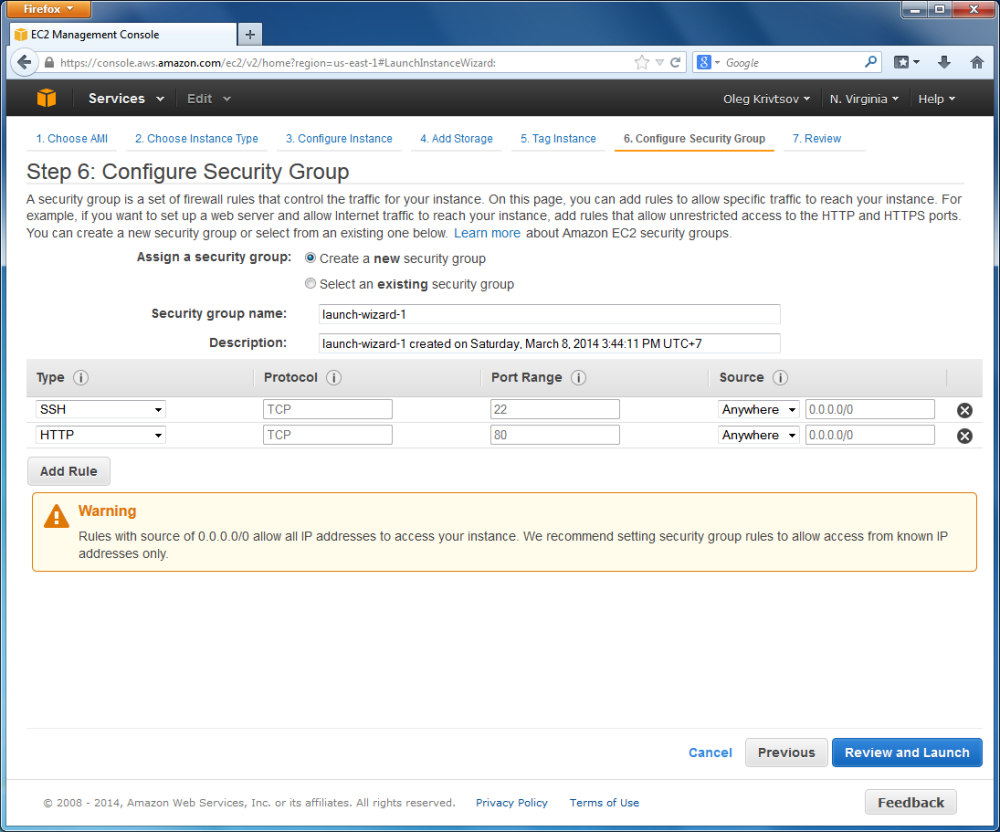 Figure E.9. Security Group page
On the Security Group page, you need to configure the security group rules (firewall) for the EC2 instance. The rules define what ports will be open for inbound access. By default, your EC2 instance allows access through SSH (port 22). You also need to add a rule allowing to access port 80 (HTTP). To do this, click the Add Rule button and enter 80 into the Port range field.
Step 7 — Review Instance Launch
Click the Next button to go to the last page named Review Instance Launch.
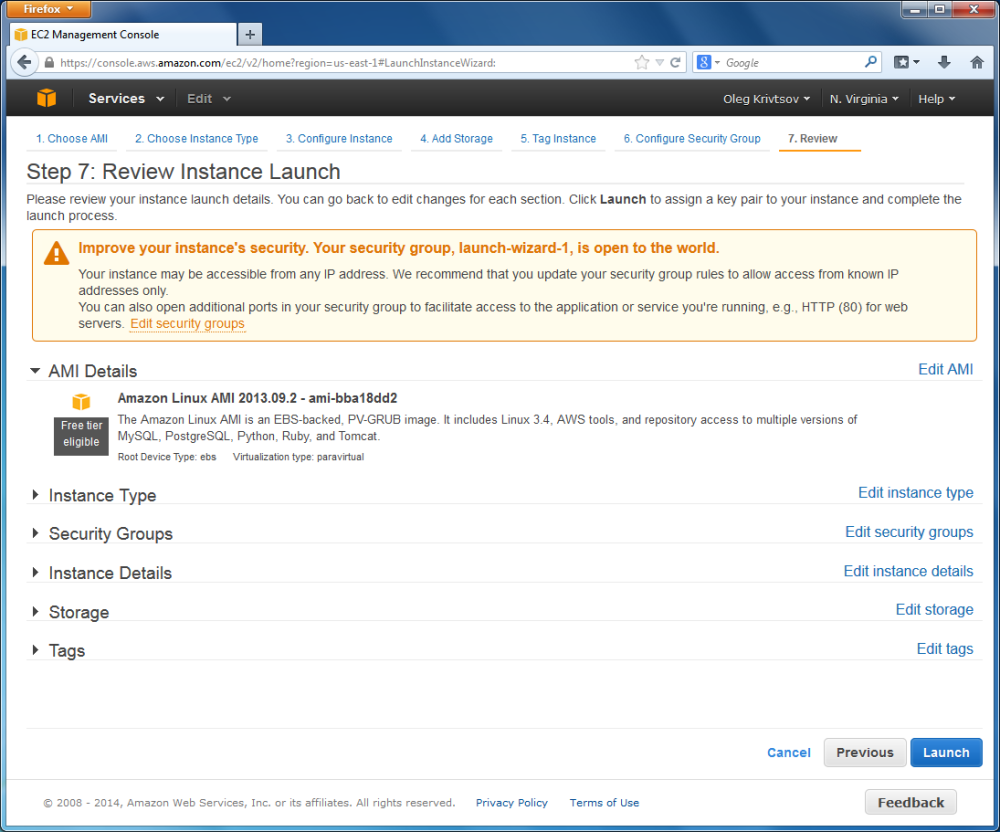 Figure E.10. Review Instance Launch page
On this page you are able to review the virtual machine settings before you launch it. When you are ready, click the Launch button. The Select an existing keypair of create a new keypair pop-up window appears.
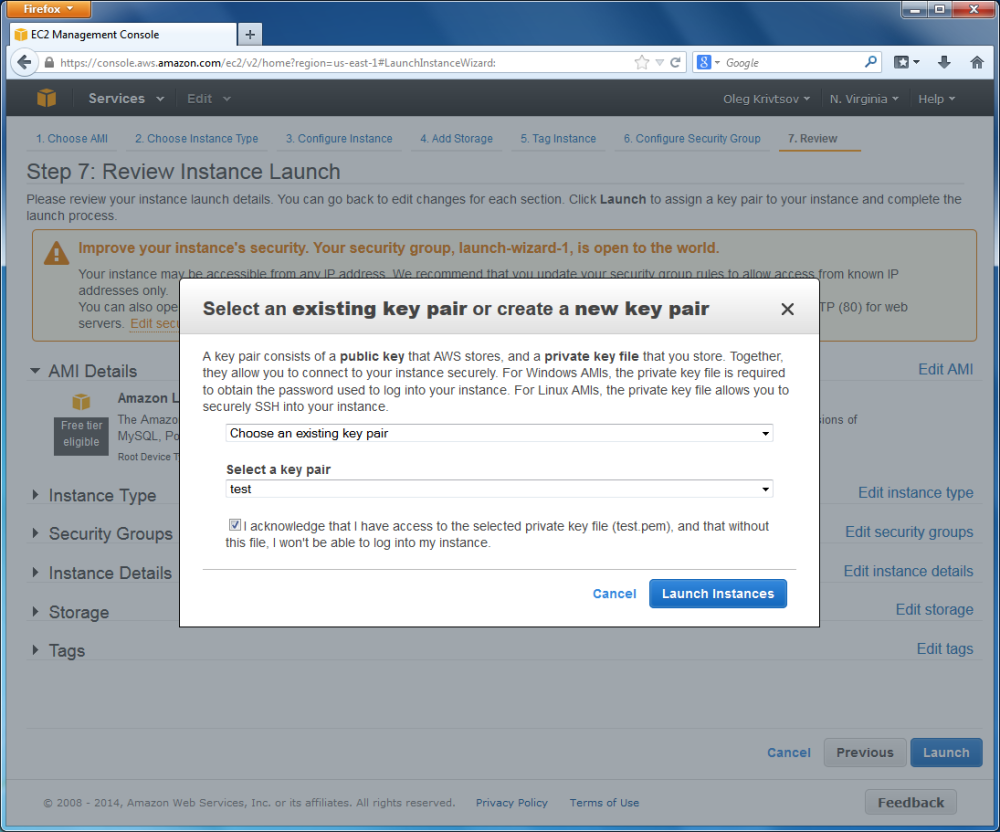 Figure E.11. Select Keypair page
In this window, select the 'test' keypair from the list of existing keypairs (we have created the 'test' keypair earlier) and click the Launch Instances button to trigger the instance launch process.
Now you should be able to see your instance on the Instances page (see the figure below).
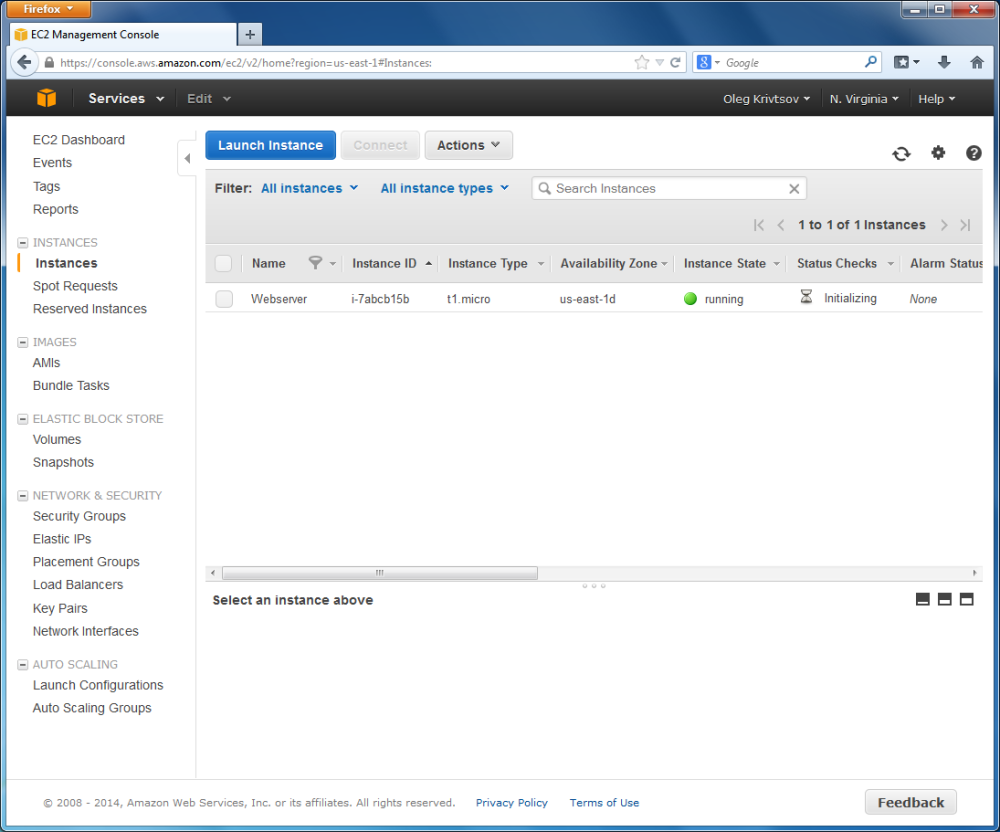 Figure E.12. Instances page