


5.4. Routing Configuration
You typically do not create the route stack (or tree) yourself, instead you provide the instructions for ZF3 on how to do that.
The routing configuration for a module is stored in module.config.php configuration file:
<?php
use Zend\Router\Http\TreeRouteStack;

return [
    //...
    'router' => [
        'router_class' => TreeRouteStack::class,
        'routes' => [
            // Register your routing rules here...
        ],
        'default_params' => [
            // Specify default parameters here for all routes here ...
        ]
    ],
];
Above, in line 6 we have the router key, under which there is the routes subkey (line 8), containing the routing rules.
You can specify which top-level route class to use (either TreeRouteStack or SimpleRouteStack)
with the router_class parameter (line 7). If this parameter is not present,
the TreeRouteStack is used by default.
You can use the optional default_params key (line 11) to define the default values for parameters
for all routes at once. However, you typically do not use this key and define
the defaults on a per-route basis.
We will show how you extract parameters from route later in this chapter.
5.4.1. Configuration for Simple Routes
A typical route has the name, type and options:
- The name is used to uniquely identify the route.
- The type defines the fully qualified name of the route type (PHP class which implements the matching algorithm).
- The options is an array that includes the route string which should be compared against the URL part, and several parameters called the defaults.
Configuration for each route under the routes subkey may have the following format:
'<route_name>' => [
    'type' => '<route_type_class>',
    'priority' => <priority>,
    'options' => [
        'route' => '<route>',
        'defaults' => [
            //...
        ],
    ],
]
Above, the <route_name> placeholder should be the name of the route. A route name must be in lower case,
like "home" or "about". The type key specifies the fully qualified route class name.
The optional priority key allows to define the priority (which should be an integer number)
of the route in the priority list (routes with higher priority will be visited first). If you
omit the priority key, the routes will be visited in the LIFO 4 order.
Routes having equal priority will be visited in the LIFO order. Thus, for the best performance, you should register routes that will match most often in the last turn, and least common routes should be registered first.
4) LIFO (stands for Last In, First Out) is used to organize items in a stack, where the topmost item, which is added last, is taken out first.
The options key defines the array of route's options. We will discuss the options
in the following sections of this chapter.
5.4.2. Configuration for Nested Routes
To organize routes in a subtree, you add the child_routes key to the route definition,
and add your child routes under that key, like below:
'<route_name>' => [
    'type' => '<route_type_class>',
    'priority' => <priority>,
    'options' => [
        //...
    ],
    'child_routes' => [
        // Add child routes here.
        // ...
    ]
],
If you need to organize the routes in a chain (degenerated subtree), you add the
chain_routes key to your route configuration:
'<route_name>' => [
    'type' => '<route_type_class>',
    'priority' => <priority>,
    'options' => [
        //...
    ],
    'chain_routes' => [
        // Add chained routes here.
        // ...
    ]
],
Looking at the two examples above, you won't see the explicit usage of
PartandChainroute types, because (for your convenience) they are used by the ZF3 automatically when it encounters thechild_routesandchain_routeskeys in your routing configuration.
5.4.3. Default Routing Configuration in Zend Skeleton Application
Now that you know how to configure routes and organize them in compound structures, let's look at the real life example. In a fresh Zend Skeleton Application, the routing configuration looks like below:
<?php
use Zend\Router\Http\Literal;
use Zend\Router\Http\Segment;

return [
    'router' => [
        'routes' => [
            'home' => [
                'type' => Literal::class,
                'options' => [
                    'route'    => '/',
                    'defaults' => [
                        'controller' => Controller\IndexController::class,
                        'action'     => 'index',
                    ],
                ],
            ],
            'application' => [
                'type'    => Segment::class,
                'options' => [
                    'route'    => '/application[/:action]',
                    'defaults' => [
                        'controller'    => Controller\IndexController::class,
                        'action'        => 'index',
                    ],
                ],
            ],
        ],
    ],

  //...
];
In the configuration presented above, we have two routing rules listed in turn: first we have the "home" route (line 8) and then we have the "application" route (line 18).
The "home" route maps the empty URL path to the "index" action of the IndexController controller. For example,
enter "http://localhost/" in your browser to see the Home page of your website. This route
is of type "Literal".
The "application" route (of type "Segment") maps URLs looking like "http://localhost/application",
"http://localhost/application/about", "http://localhost/application/news", etc onto the corresponding
action of the IndexController controller. The actual action name is determined by the "action" parameter.
The default value for this parameter is "index". That means that if you do not specify any action, the request
will be dispatched to "index" action.
This configuration corresponds to the tree route stack shown in figure 5.5:
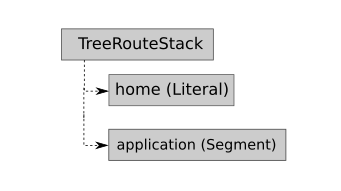 Figure 5.5. Default route stack in the Skeleton Application
In the next sections, we will provide some examples on how to use the route types in your website.