


Connecting to EC2 Instance through SSH
Next we want to connect to the virtual server we’ve just created. In this tutorial, we will use PuTTY – a free implementation of Telnet and SSH for Windows and Unix platforms.
Download PuTTY archive from this link. Then unzip it to some folder.
You need to import the key pair you have downloaded earlier as a PEM file. To do this, run PUTTYGEN.EXE from PuTTY distribution. PuTTY Key Generator window appears. In this window, click the Load button and choose your PEM file to load your existing key pair. Next enter some password to protect your key (see the image below). Remember the password, because it will be needed later.
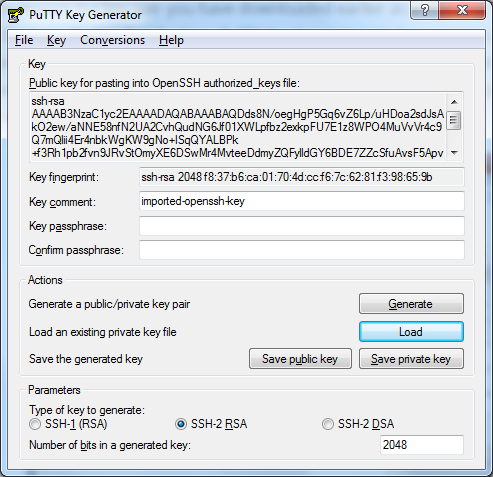 Figure E.14. Key import
Finally, click the Save private key button to save your password-protected key as a PPK file.
Now you are ready to connect to your EC2 instance. Run PUTTY.EXE from PuTTY distribution. The PuTTY Configuration window appears. In that window, select the Connection->SSH->Auth category from the side bar menu and enter the path to your PPK file into the Private key for connection field (see the figure below).
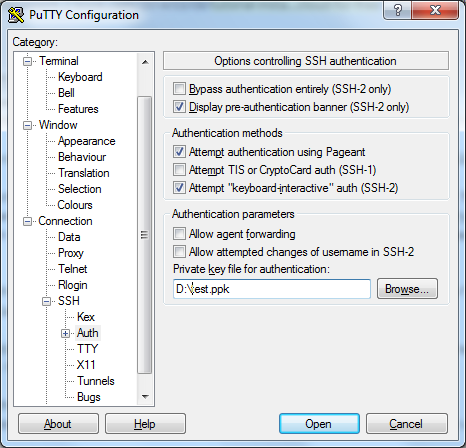 Figure E.15. Private key
Select Window->Translation category from side bar menu and select the UTF-8 encoding from drop-down list (see the figure below for example):
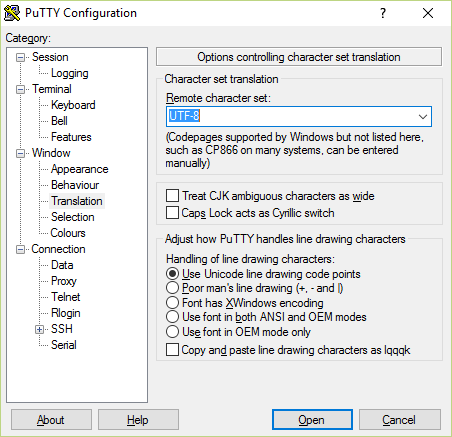 Figure E.16. Translation
Select Session category from side bar menu. Into the Host name (or IP address) field, enter the IP address you assigned to your EC2 instance. In the Saved sessions field, enter 'webserver' and press Save button. Now the information you entered is saved, so you don't have to enter it each time you connect.
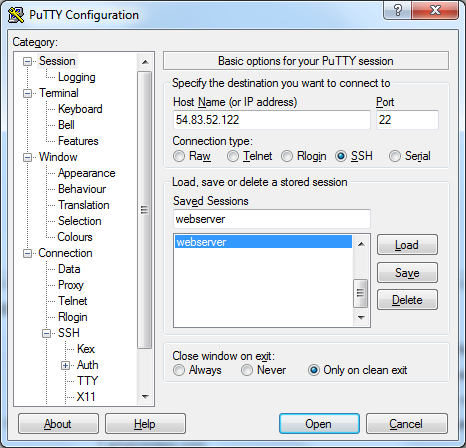 Figure E.17. Session
Now double-click the webserver item in the list of saved sessions. Terminal window appears. You need to enter 'ec2-user' as your login and press Enter. Then enter the password that you used when creating the PPK file and press Enter again. If everything is OK, you should be able to see the prompt like in the figure below:
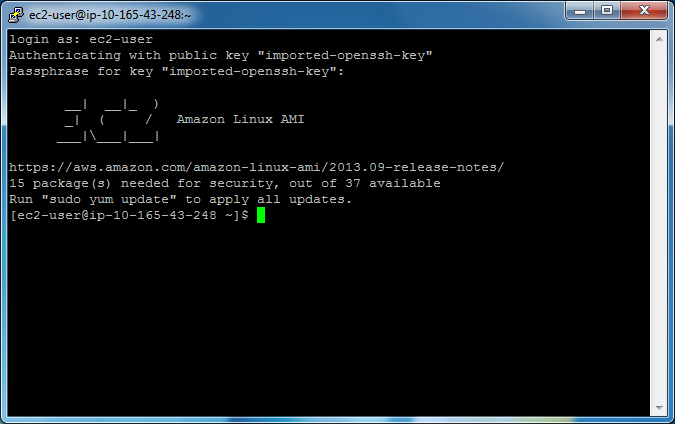 Figure E.18. Terminal windows
In the shell terminal window, you can type commands and see the results of the command execution.